Digitising Cookbooks
The following post outlines how I digitised two of my most frequent used cookbooks.
While it’s actually nice to have the “real” cookbook open during the process of cooking in comparison to an Android tablet or iPad, which frequently needs to be unlocked to display the recipe again, it’s also useful to have the recipe online as well. In particular if you’re away on a holiday, where you are doing the cooking yourself.
Taking the pictures
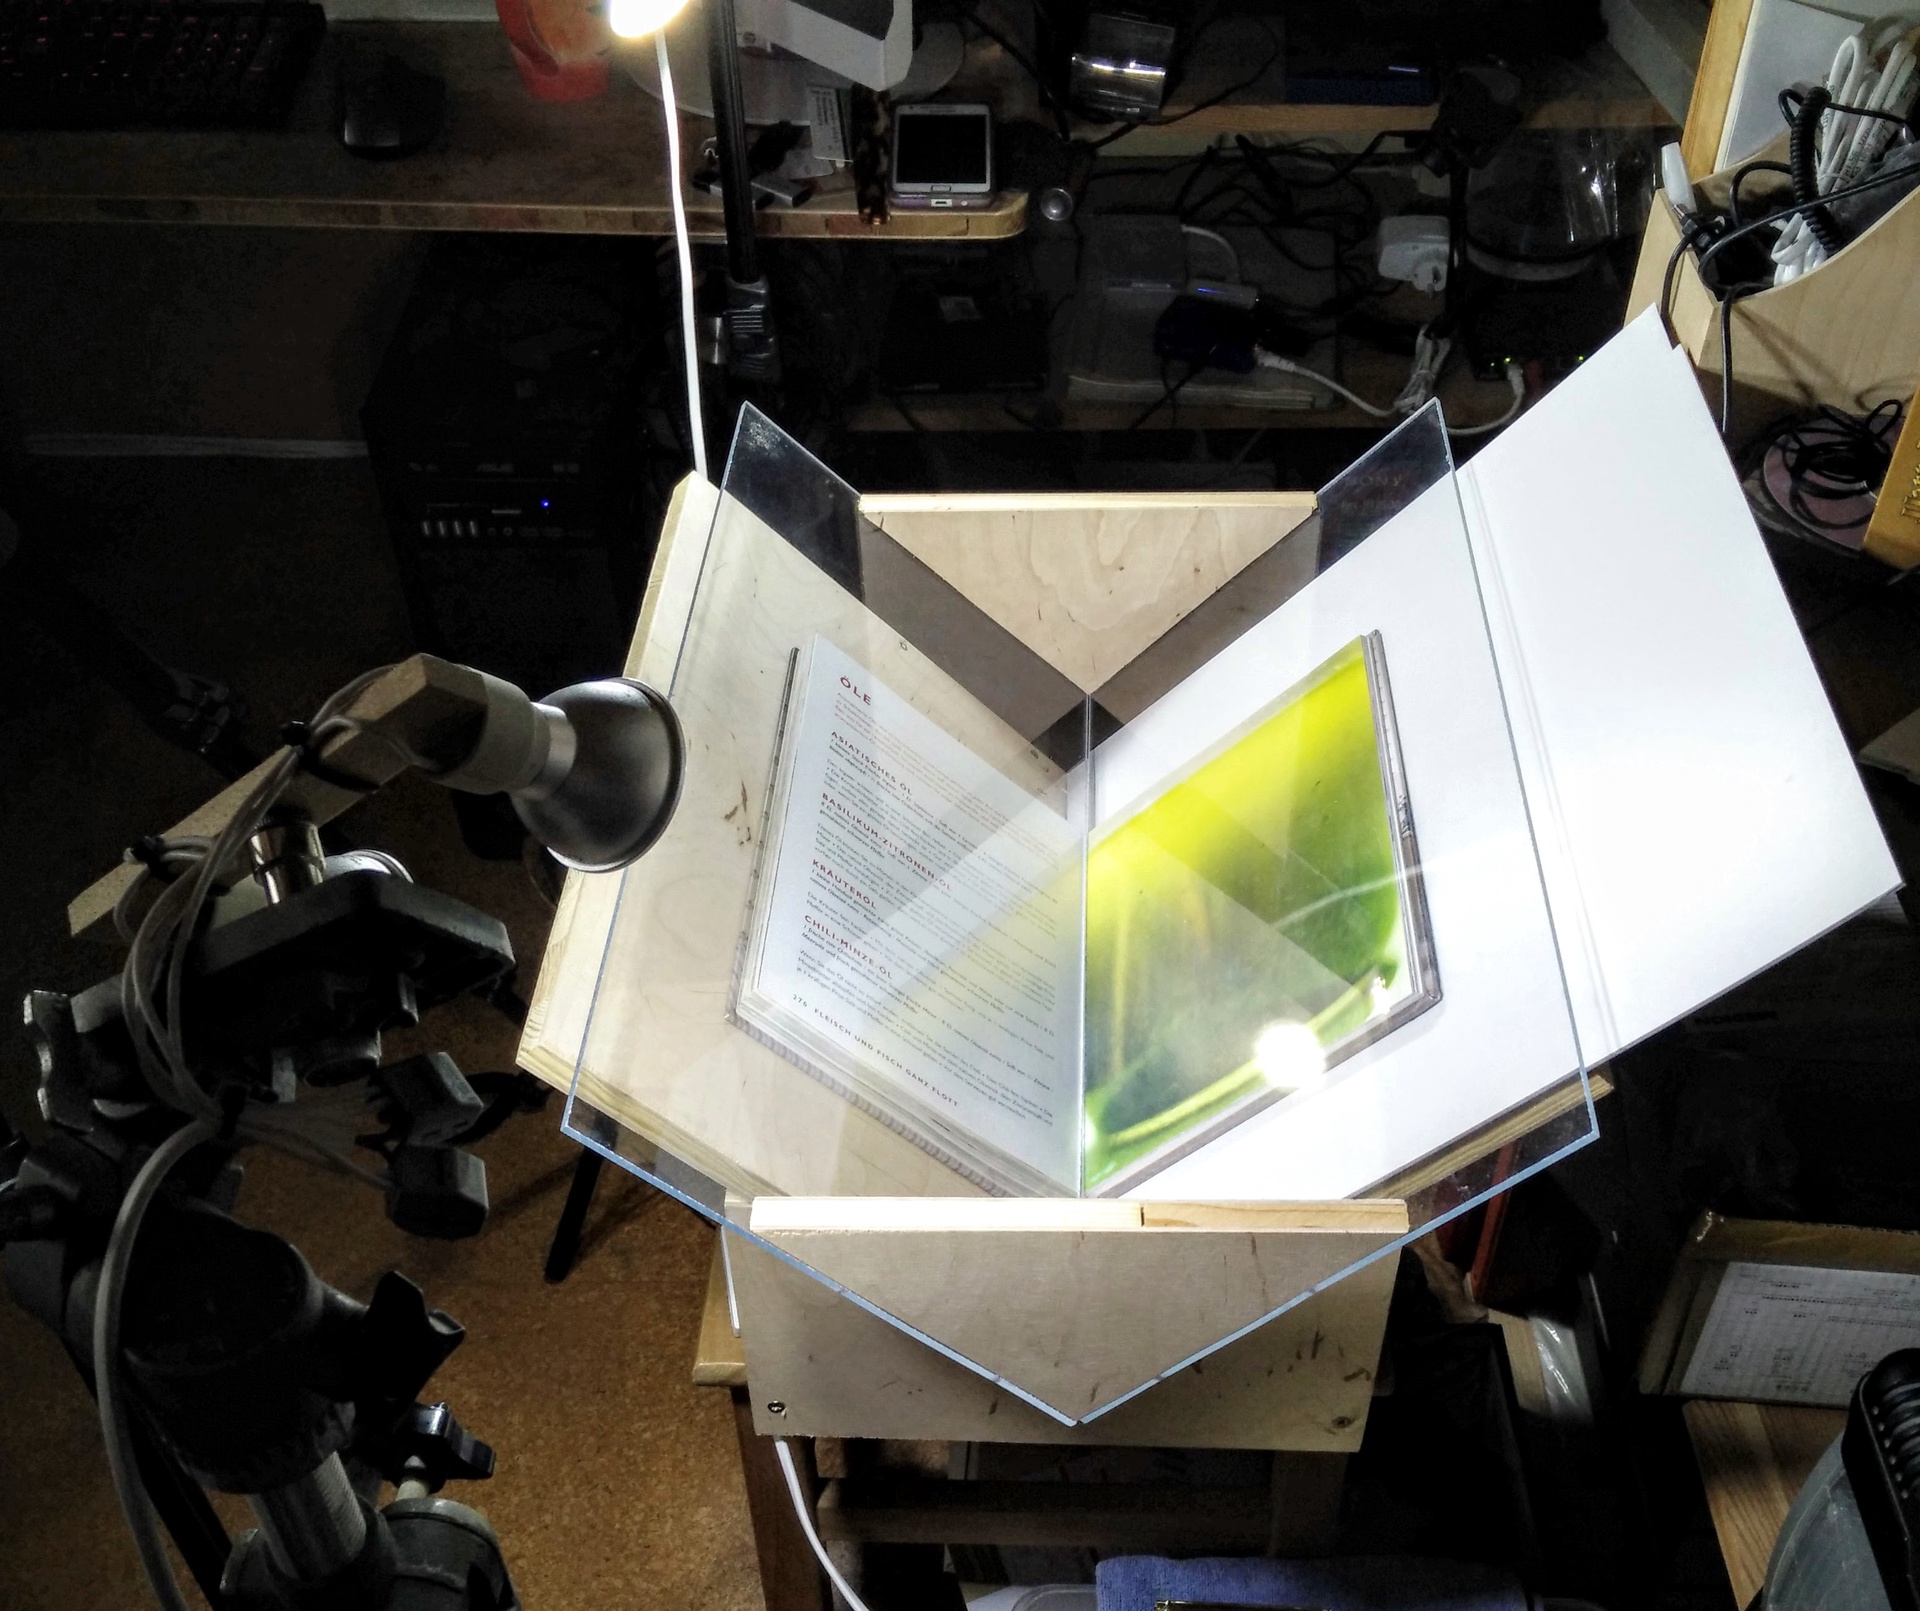
Since cookbooks are usually quite large and heavy, I build the contraption on the right. The whole thing is made from 2 plywood boards with a dimension of 40cm x 27cm and another 2 boards with a dimension of 27cm x 16cm for the stand. It was just some leftover boards from other projects. The construction should be fairly obvious from the pictures. I reused the triangular cutouts from the boards for the stand to build the helper utility with 2 acrylic glass sheets to keep the book open and the pages flat. I used an angle of 90° degrees for positioning the two larger boards, where the book comes to rest. You might want to choose a larger angle of 100° or 105°. Manually drawing some marks on the boards is also useful, for instance, every 1cm or every inch. This makes it easier to put the book into the same location.

When I started this digitising project originally 2 years ago (I only did one chapter then), I was still using the Canon 450D. 2 Nikon flashlights in manual mode lighted the pages. This takes a bit of trial and error to get the exposure right.
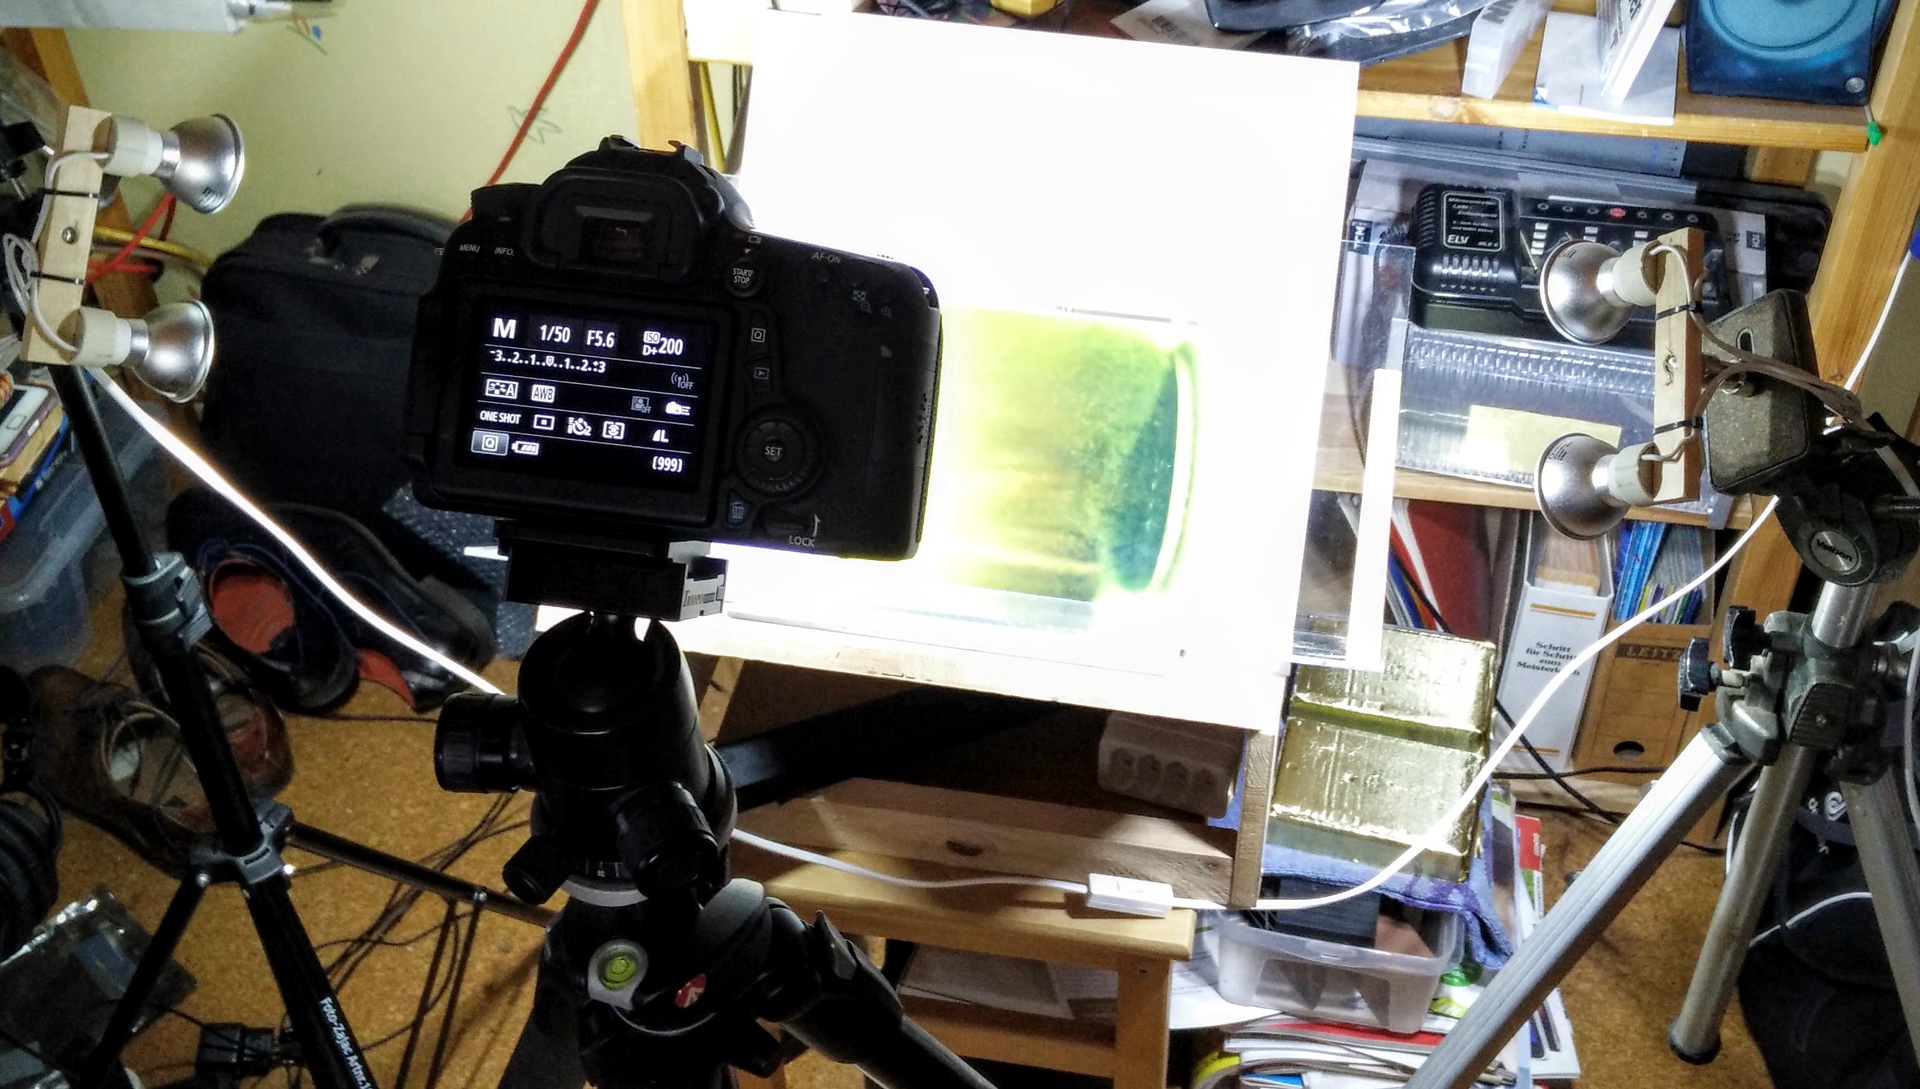
LED lamps are pretty powerful now and produce a lot of light. I build a setup consisting of 4 lights, 2 on each side of the book. The lights need to be positioned so that they don’t produce any reflections in the picture.
All parts for these light may be purchased at your local home improvement store or at Amazon. The LED lamps for the typical living room usage have a colour temperature of about 2700 Kelvin. For this reproduction purpose, I explicitly selected LED lamps with a colder colour temperature. I think, they are specified at 5800 Kelvin. The LED lamps are directly connected to the power grid, meaning they operate with a voltage of 220V.
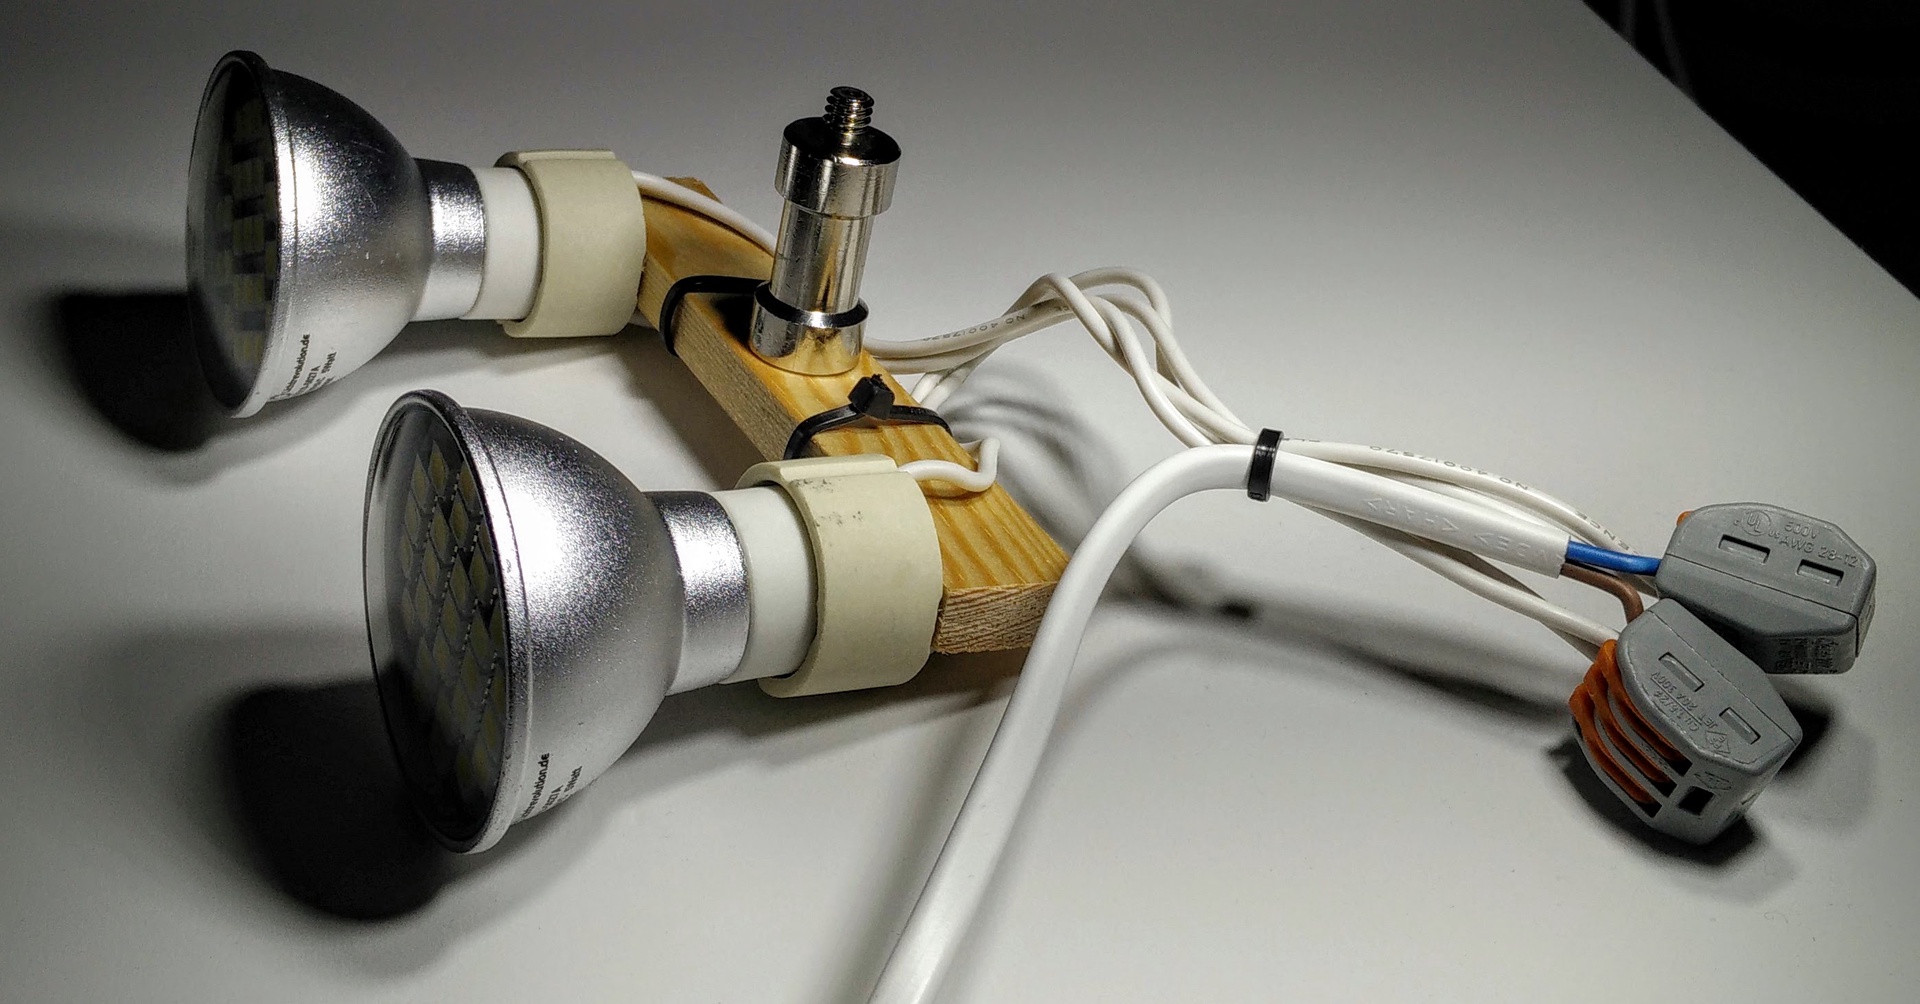
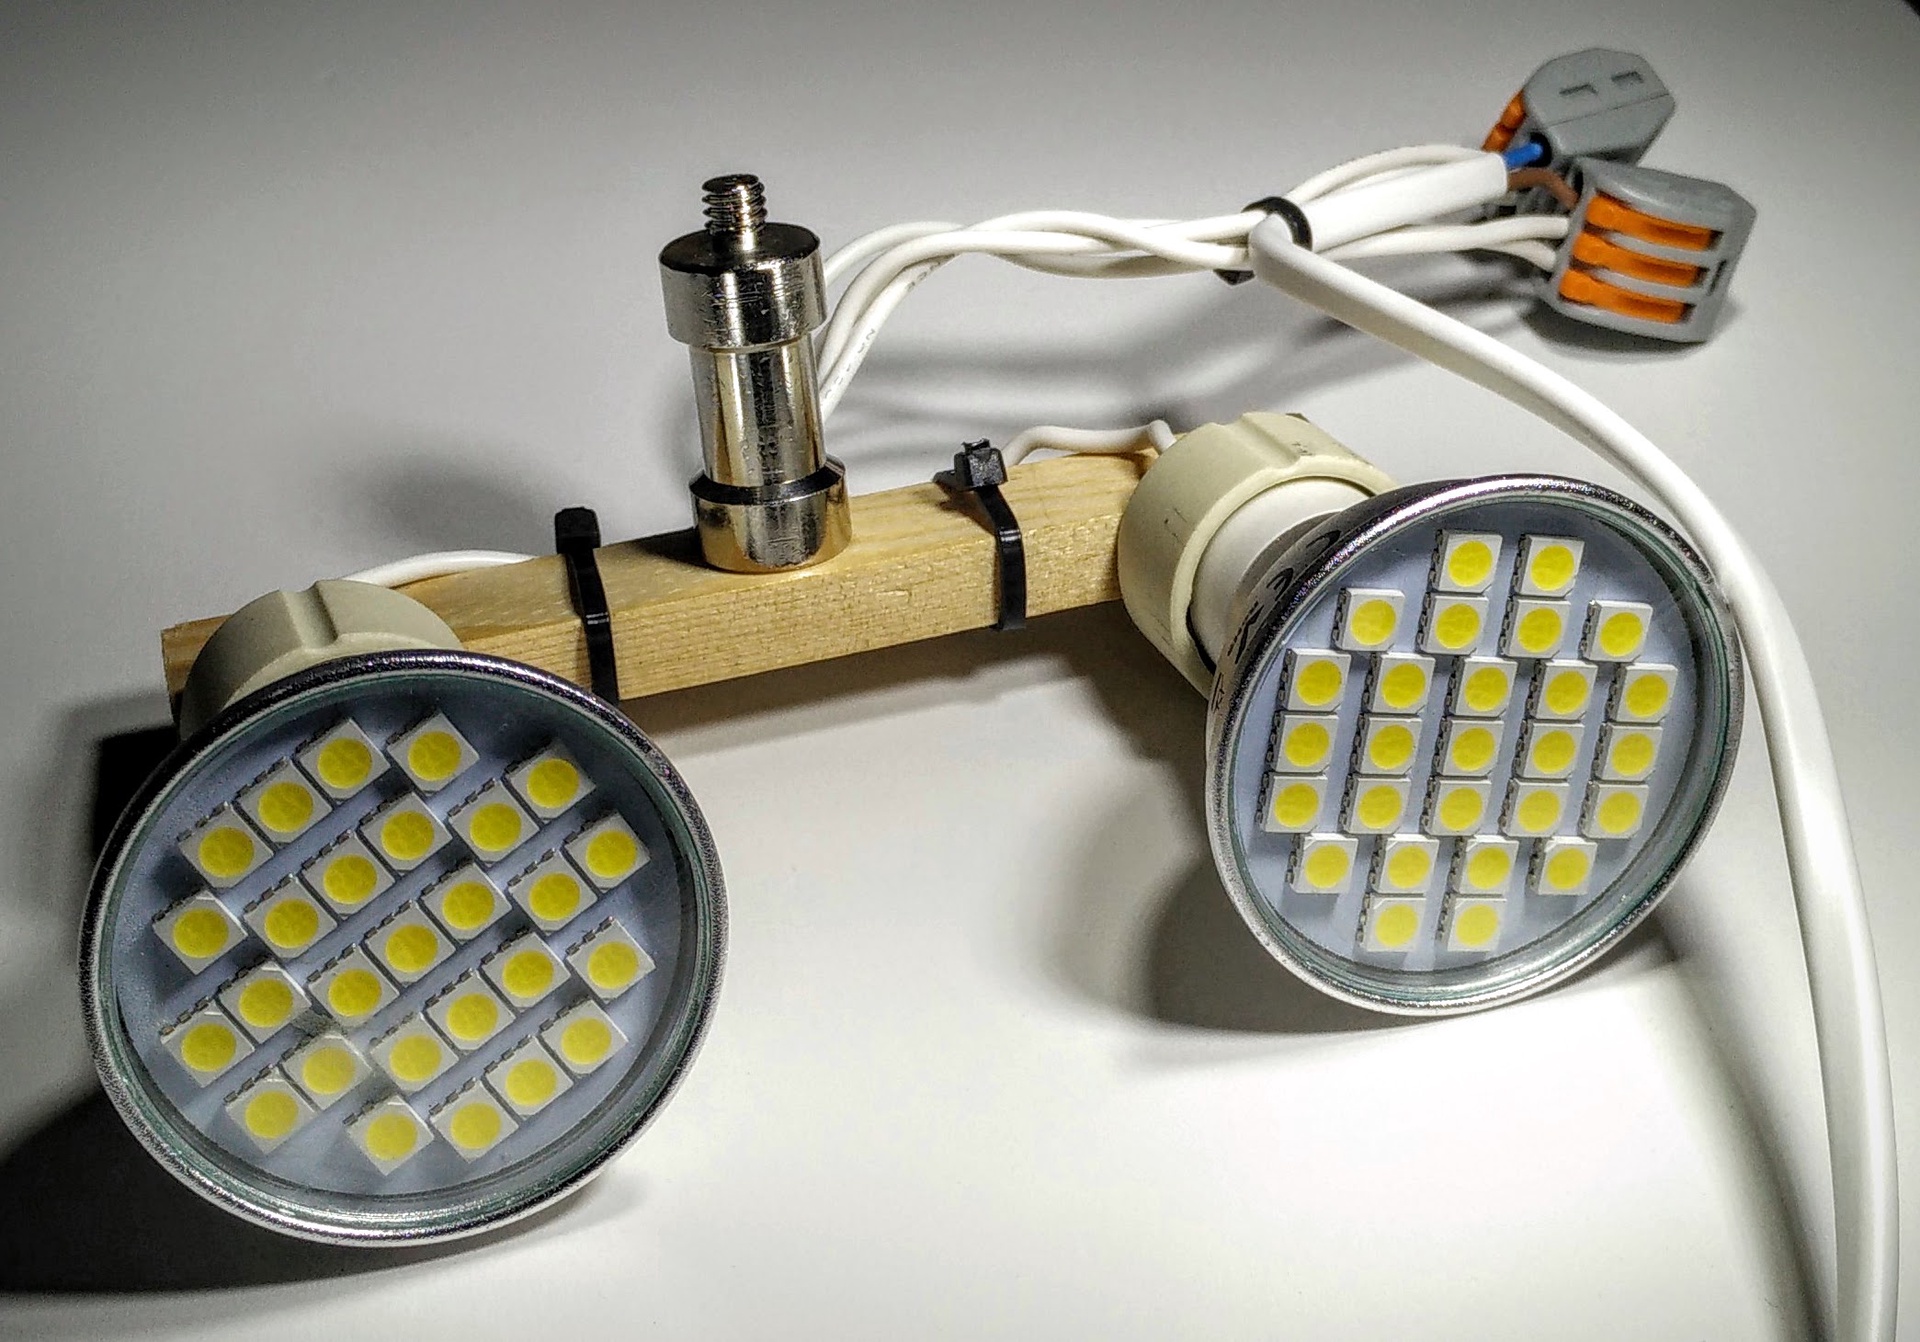
Warning: I’m not a certified professional electrical engineer. If you’re building something like these lights, you do so at your own risk. Apply enough binders, so no accidental pull on the cables will expose any blank wires carrying voltage from the grid.
I drilled a hole for a ⅜" thread into the middle of the wood and cut a thread into it. With the tripod adapter attached, the lights can be used with standard photography lighting stands.
I’m using the Canon 70D with the cheapo 50mm 1.8 lens set to live mode auto-focusing. The four LED lamps produce enough light for a shutter speed of about 1/50s and an aperture of 5.6. Once the exposure is set, it will stay the same during the whole session. For this type of photography I don’t bother with the RAW format, but instead, shoot JPEG directly. I did create a custom white balance setup for the LED lamps specifically.
In the first pass, I’m photographing all even pages from beginning to end. Then I’m turning the book and photograph the odd pages from end to the beginning of the book. I’m using a Canon RC-1 IR remote control to trigger the camera.
Postprocessing
For post-processing the photos I’m using Corel Aftershot2 Pro since I’m on Linux. I’m sure Lightroom from Adobe would work just as well. I’ve tried Darktable (only before version 2), but I couldn’t process the picture quite as fast as with Aftershot2 Pro. In general, I think Darktable is just as powerful as Aftershot2, but I couldn’t yet get real comfortable with it.
The first step is to rename the pictures. I’m renaming them to their original page number so that the page order is the same as in the book. In the same pass, I’m also doing the initial rotation, either 90° degrees to the left or the right. Then, as when creating the pictures, I’m processing the individual pictures in two passes, first the odd page numbers and then the even. Typically, there will only be minimal changes necessary from one odd page to the next odd page, usually some slight changes to the rotation and the crop of the image.
Automatic image correction did a pretty good job of producing the best images. There was nothing much to improve by manually moving the sliders. Some more un-sharp masking and the image was ready. If you memorised the “S” and “C” keys for vertical/horizontal rotational alignment and cropping and were doing Copy & Paste of the adjustments from the last processed picture, you could have a picture ready in 15 to 20 seconds on average.
Once all pictures are processed, I would select all images and pass them to an Aftershot output queue for applying the adjustments to the pictures and actually creating the final output image file. I’ve created an extra output queue, which produces images with 1024 pixels on their longest side. I’ve found this to be a good balance for file size and readability. In particular, when the pages will are viewed on mobile devices like phones or tablets.
Uploading
At this point, I have all images edited and in a single directory in the correct resolution. My destination file format will be PDF and since many recipes are spread over more than one page I’m going to put all relevant pages into one PDF.
In the final step one or two image files, which represent one recipe, are converted into a single PDF file. The PDF is moved into the appropriate category or chapter subdirectory.
I’m using GNU Emacs and org-mode and from org-mode the “babel” feature in particular for this final step.
I manually copied the table of content of the cookbook to the top of
the org file. Then I’m invoking an external shell command ls -1 and
read all images file names in a single column listing into the same
editor buffer. With the table of content at the top of the file, I can
wrap #+begin_src/#+end_src tags around those image files, which
make up a chapter. In parallel, I have an image viewer open so that I
can name the PDF files after the title of the recipe. Using an Emacs
macro and registers will simplify this task much.
In the end, the org-mode file has this structure:
* Jamies Kochschule

Quick Pasta 40
Wonderful WOK-Meals 58
…

#+begin_src sh :tangle quick_pasta.sh
convert -density 96 042.jpg 043.jpg quick_pasta/"Spagetti mit Tomatensauce".pdf
convert -density 96 044.jpg 045.jpg quick_pasta/"Pasta mit Spinat und gebackenem Camenbert".pdf
…
#+end_src

#+begin_src sh :tangle wok-meals.sh
…
#+end_src

…
In effect, this will produce some simple shell scripts after tangling
the org-mode file. These shell scripts use the convert utility from
the
ImageMagick toolkit to
produce the final PDF files.
The use of rclone uploads the PDFs to your preferred storage provider. Once the particular storage provider is configured, the chapter directories are transferred. Here it is Google Drive.
rclone copy wok-gerichte gdrive:Rezepte/"Jamie Oliver - Kochschule"/wok-gerichte/
Links to some of the used parts
Here are some links to parts on the German Amazon site. They should give you an idea to find similar stuff.